Need to figure out how to edit the Hosts file in Windows Server? For the most part, it’s pretty much the same as Windows XP and Vista, but with a few extra hiccups!
Just if case you don’t know, the Hosts file is where you can manually enter a hostname and an IP address pair, thereby bypassing the DNS server. This can be pretty useful in certain situation, especially for anyone in IT.
The path to the Hosts file in Windows Server is the same as usual:
%systemroot%\system32\drivers\etc\
where %systemroot% is usually c:\windows unless you installed Windows on a different partition. By default, you cannot see these hidden folders since they are system folders.
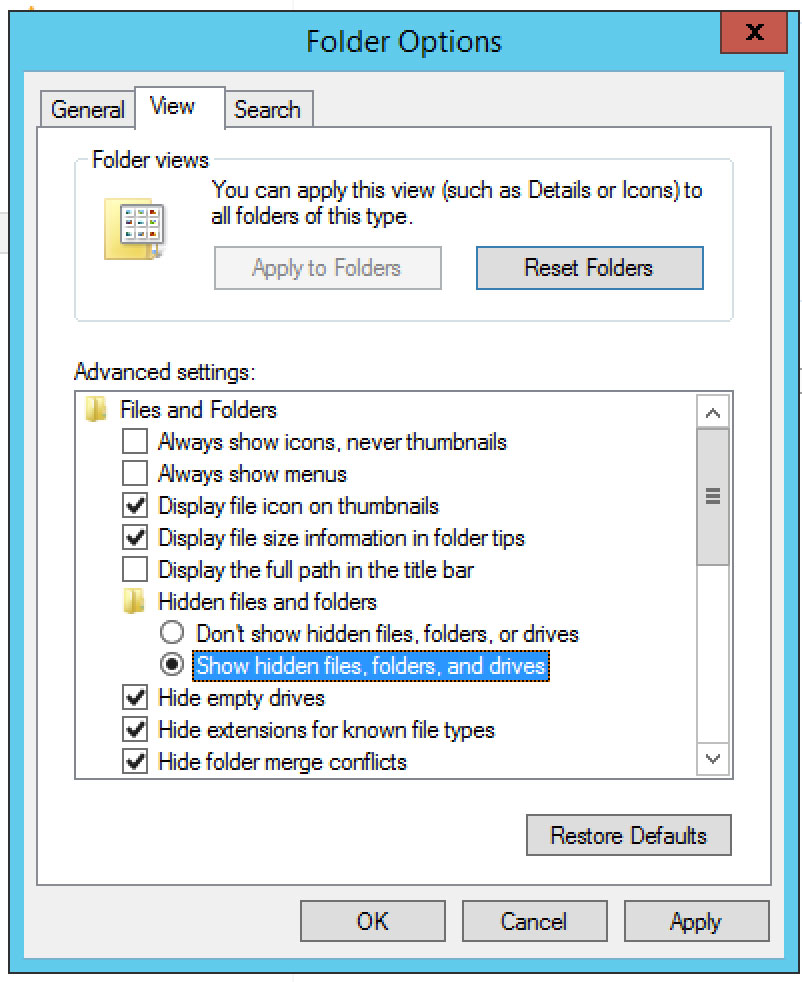
To show hidden folders in Windows, press the ALT key while in Explorer to bring up the File menu. Click on Options.

Click on the View tab and then click on the Show hidden files, folders, and drives radio button under Hidden files and folders.
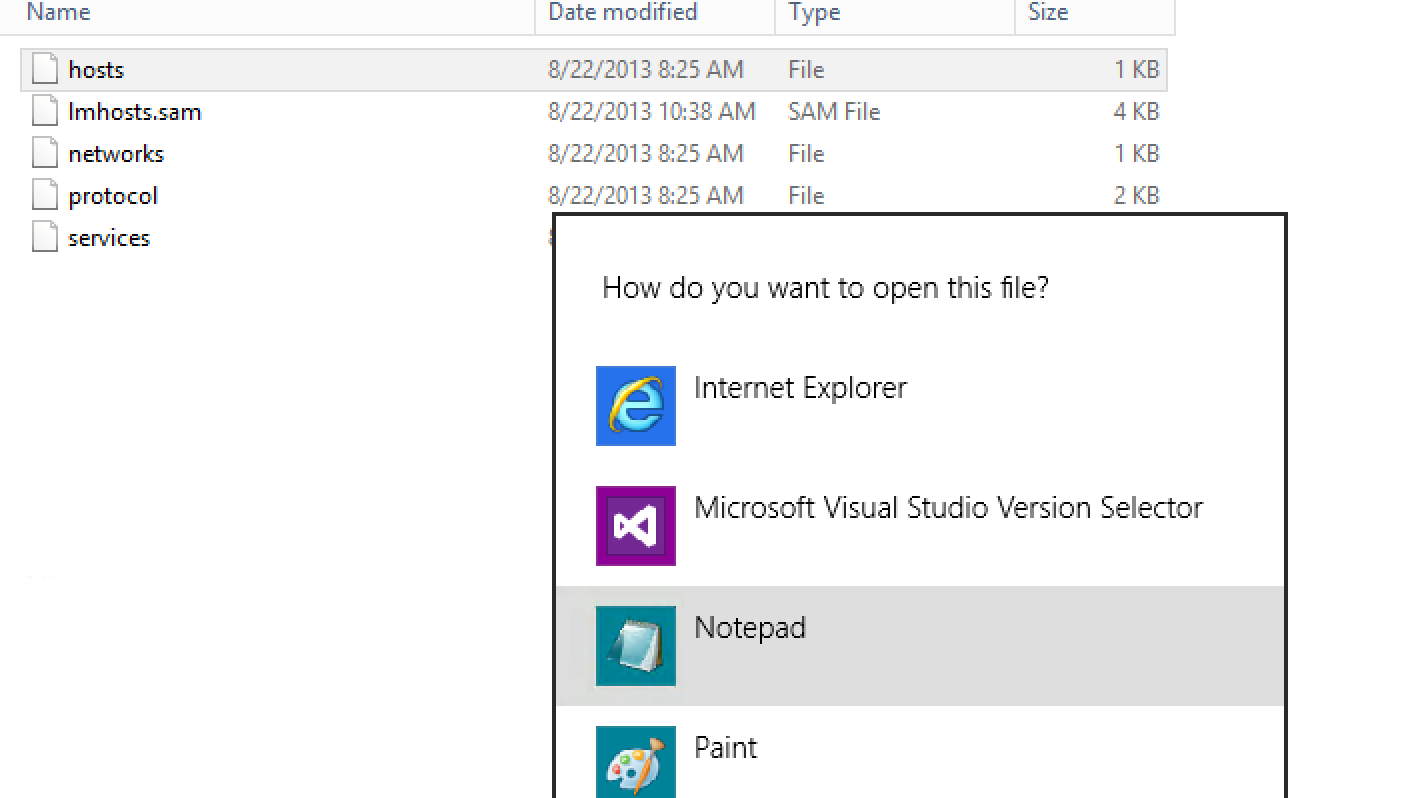
Now navigate to the directory above and open the hosts file and make your changes.
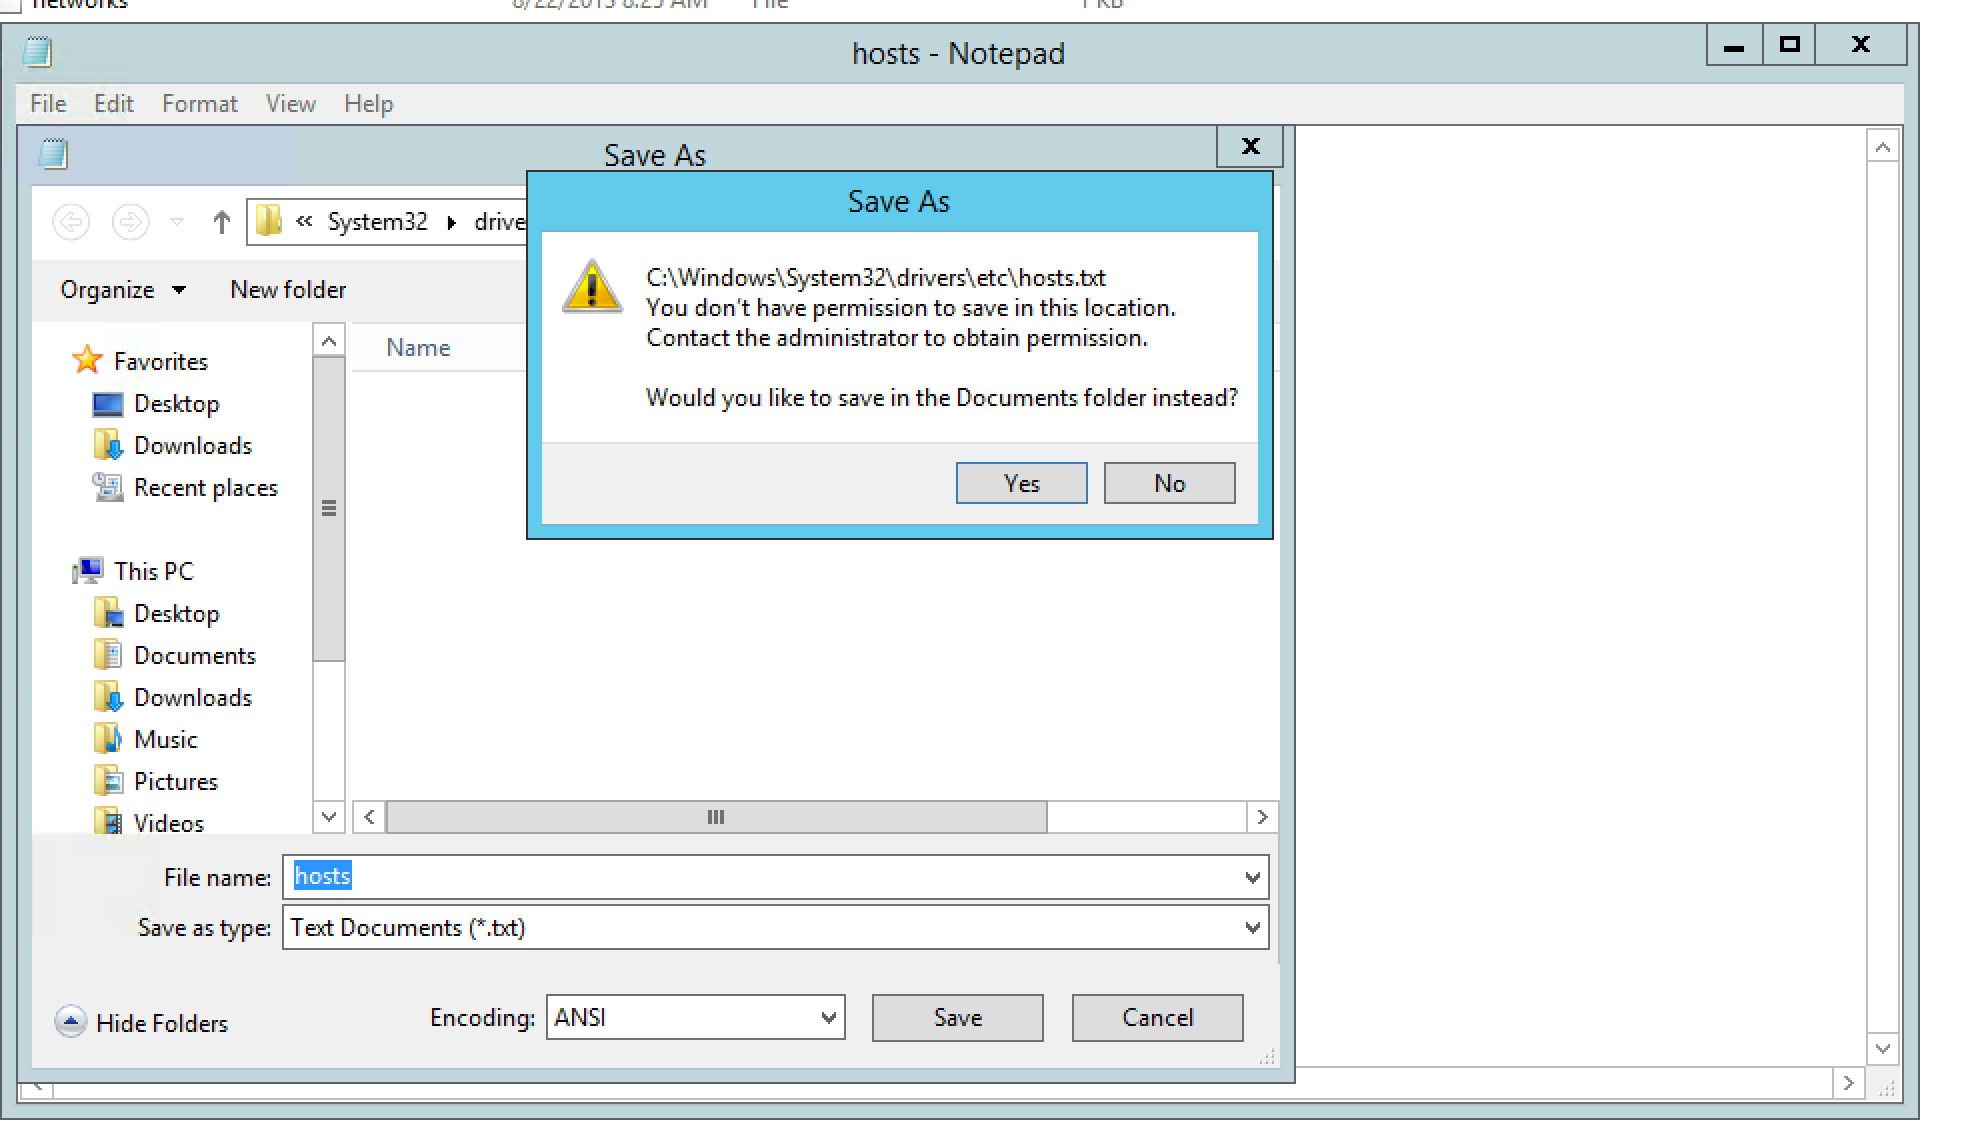
Note that this method for editing the Hosts file will not work. You will get a message saying you do not have permission to save in this location.
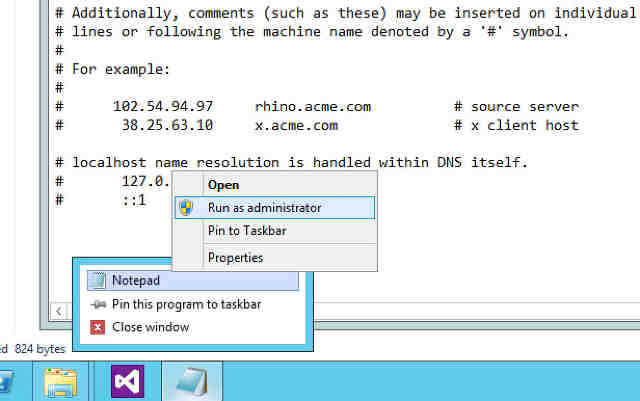
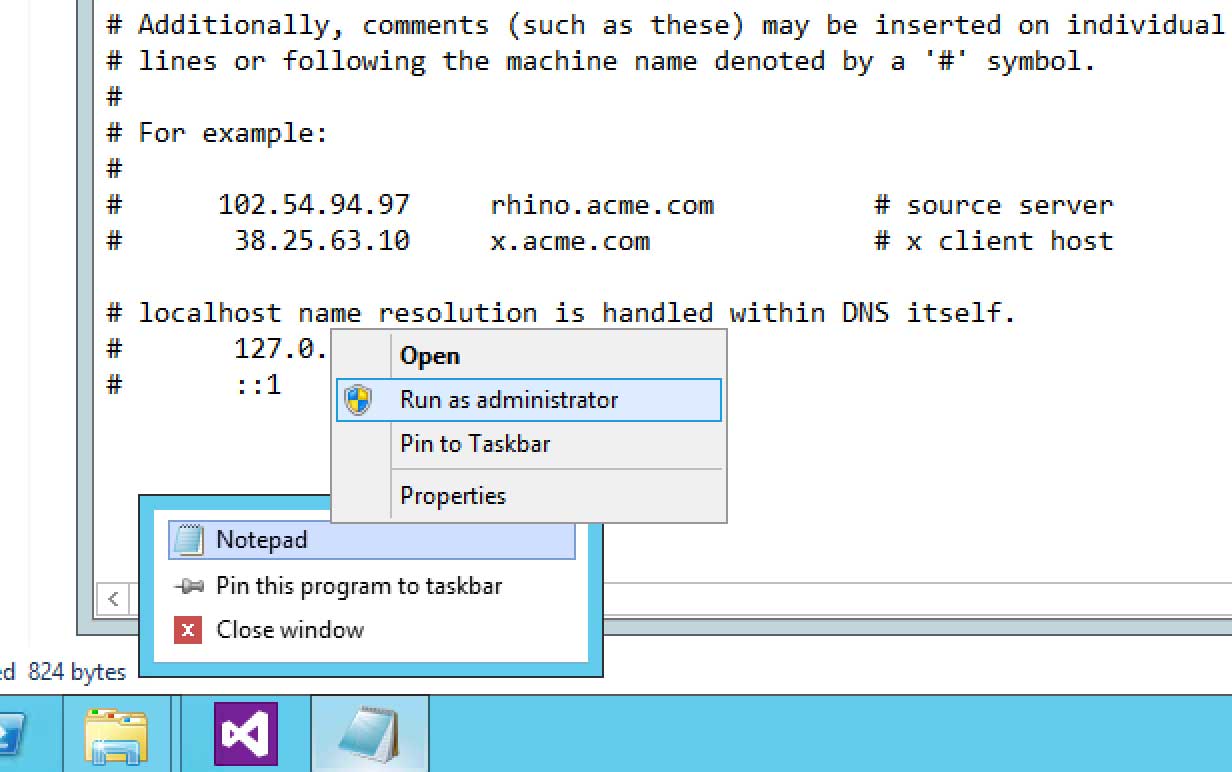
In order to edit it, you have to click on Start, type in Notepad and then right-click on Notepad and choose Run as Administrator.
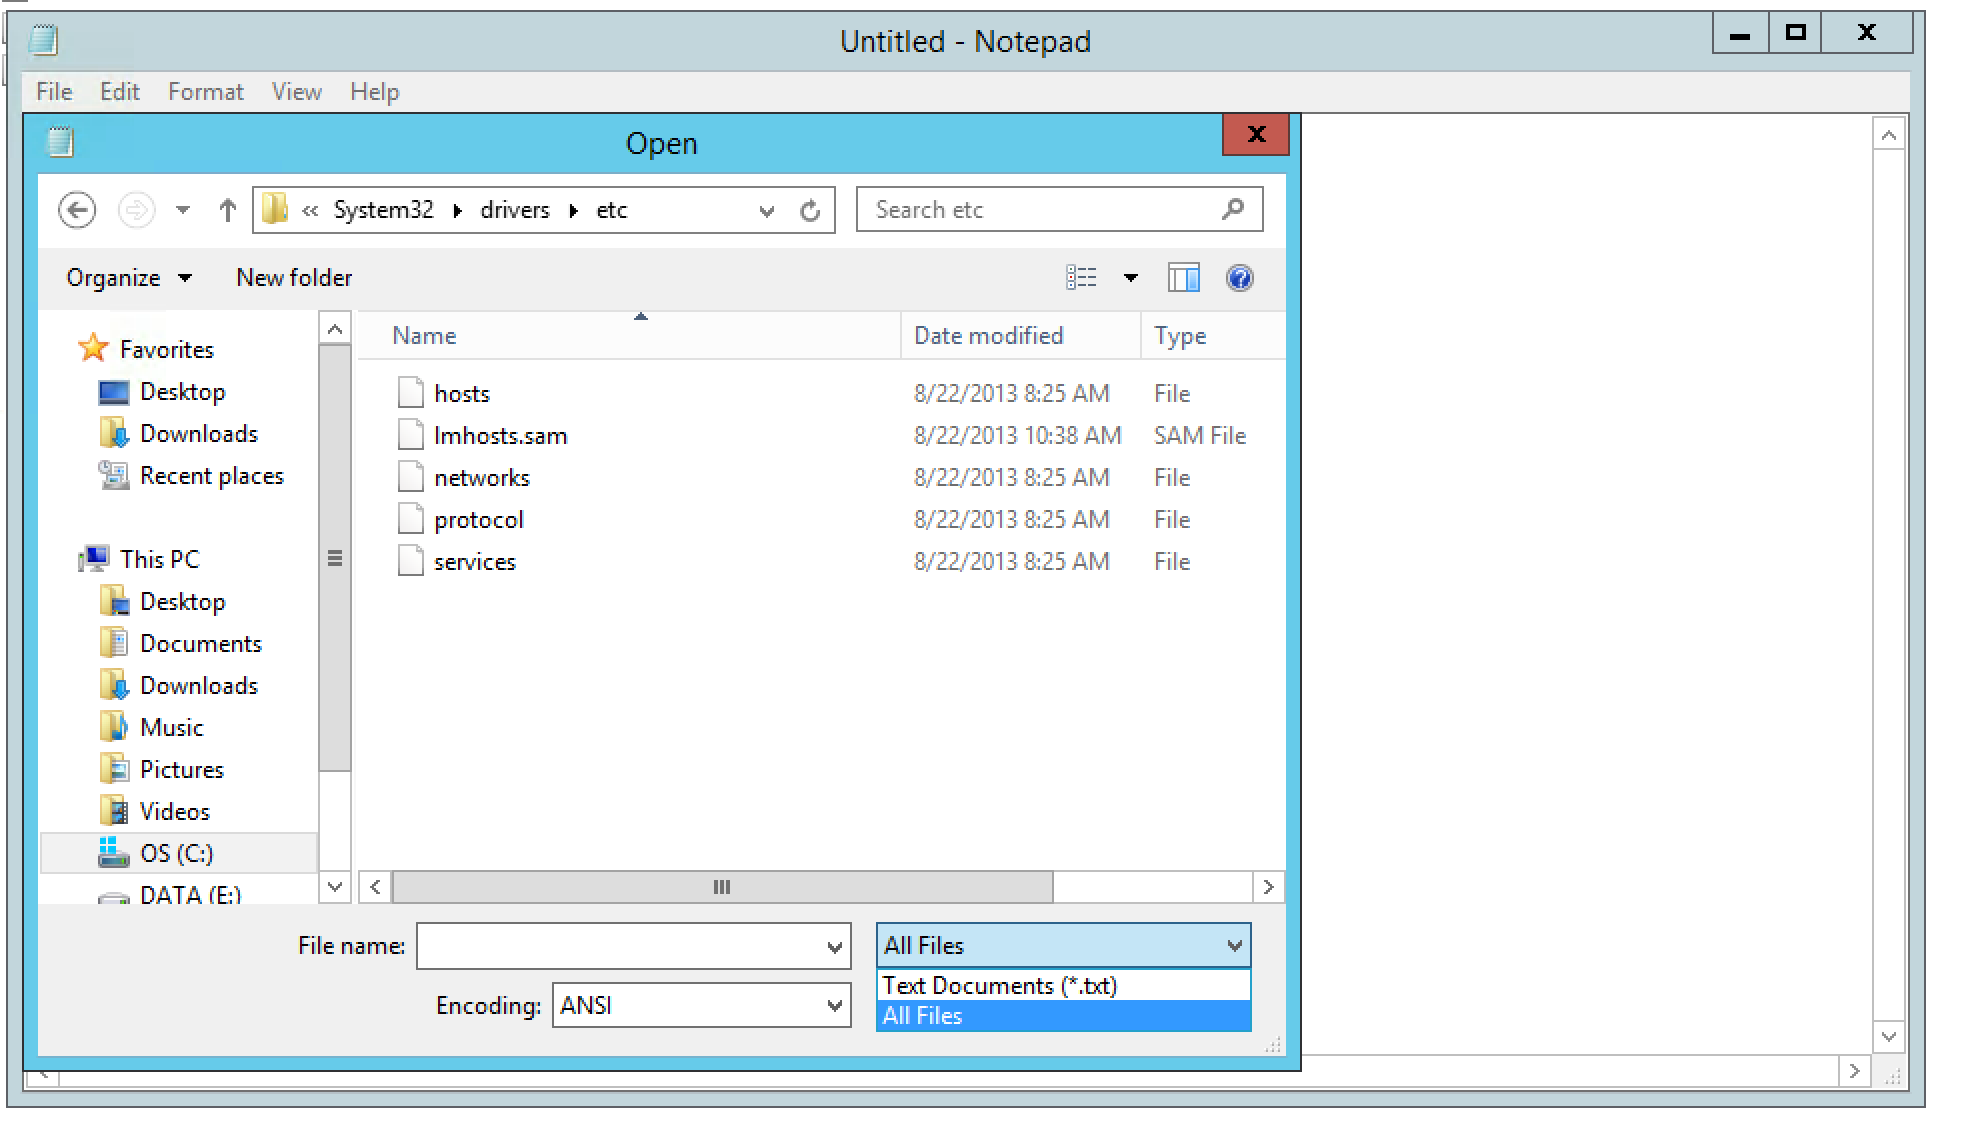
Now navigate to the drivers/etc folder again and make sure to choose All files for File Types otherwise you won’t see the Hosts file.
Make your changes to the Hosts file and click File and Save to save all changes. Now you will not get the error about not being able to modify the Hosts file. Enjoy!


